The journey of a thousand miles begins with the first step, and this is mine.

Tag: hiking Page 4 of 7

An Elk-tastic Adventure

Our first day was a long one. It started simply enough with an “oh-early-thirty” morning scramble to the airport to catch the first flight in our trip for my brother and I. By the time we landed in Phoenix Arizona, we had jumped over two time zones. We grabbing our bags, loaded the rental car, and headed North to Payson. When we finally sat down for “lunch” in Payson, it had been over eleven hours since our first meal of the day.

We would spend the next week or so, searching for the elusive elk. While we can have a great, long discussion on the pro’s & con’s of forest and game management some time, the basic truth is, the precipitate of this travel was my brother’s fondness for hunting game and his lottery draw of an Arizona elk tag for this year. So with an offer to go along, hike and explore a new part of the country, we’re off to Arizona.

Once we had arrived in Payson and got settled in to a motel, we spent the first day and half doing rapid recon and exploring the various areas South of the Arizona Mogollon Rim, where we would be spending some quality time over the next week. My brother had even found a contact who was willing to drive up from Phoenix and spend a half day driving us around, highlighting preferred spots, and offering area tips.

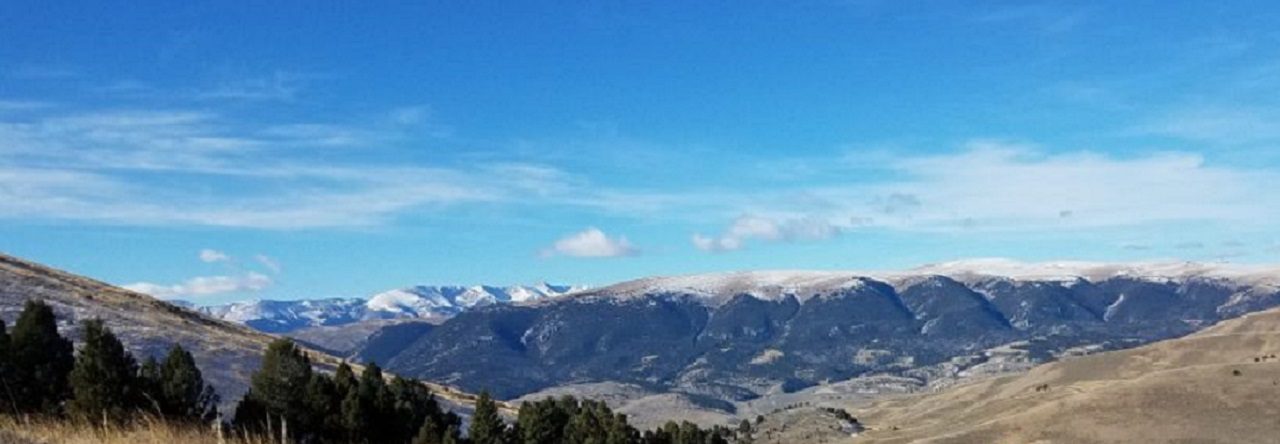
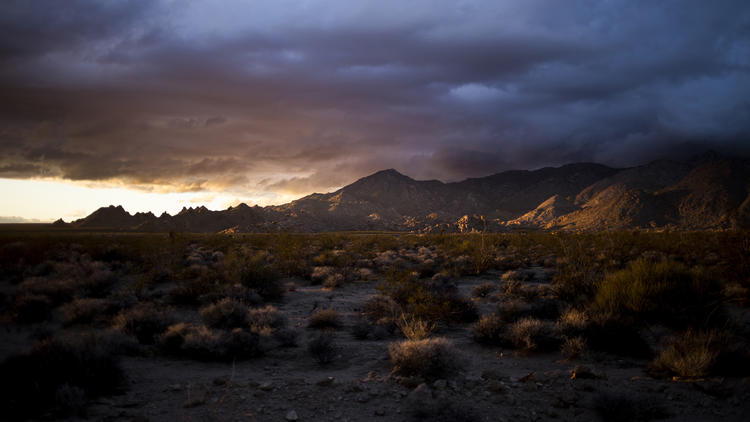
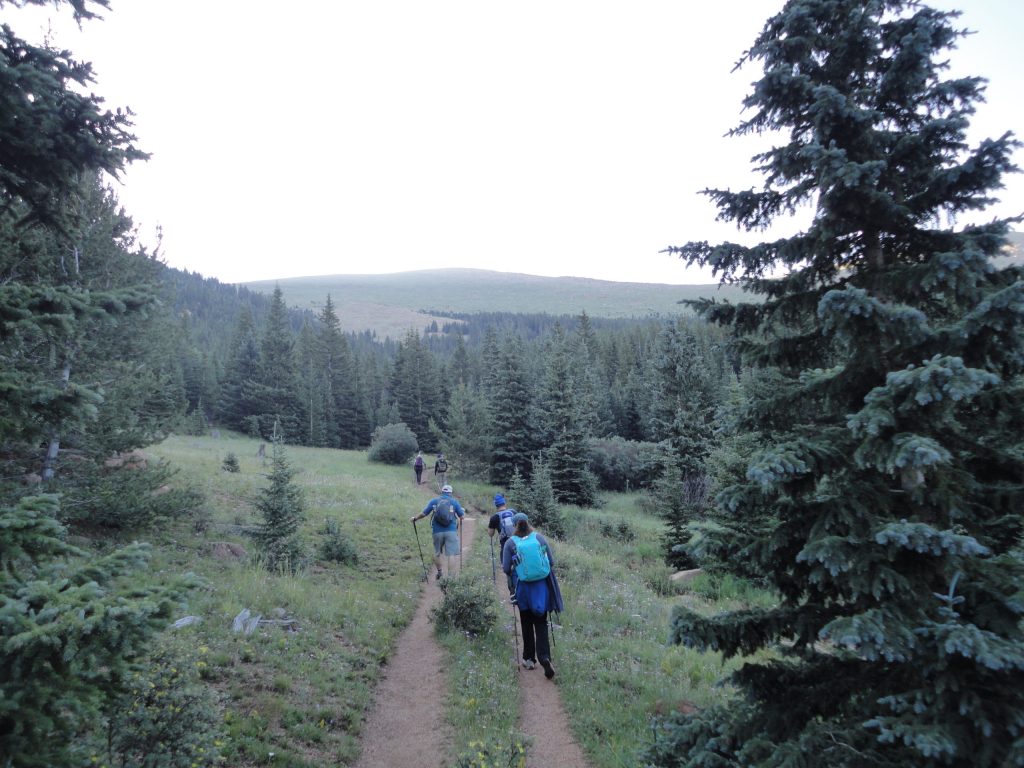
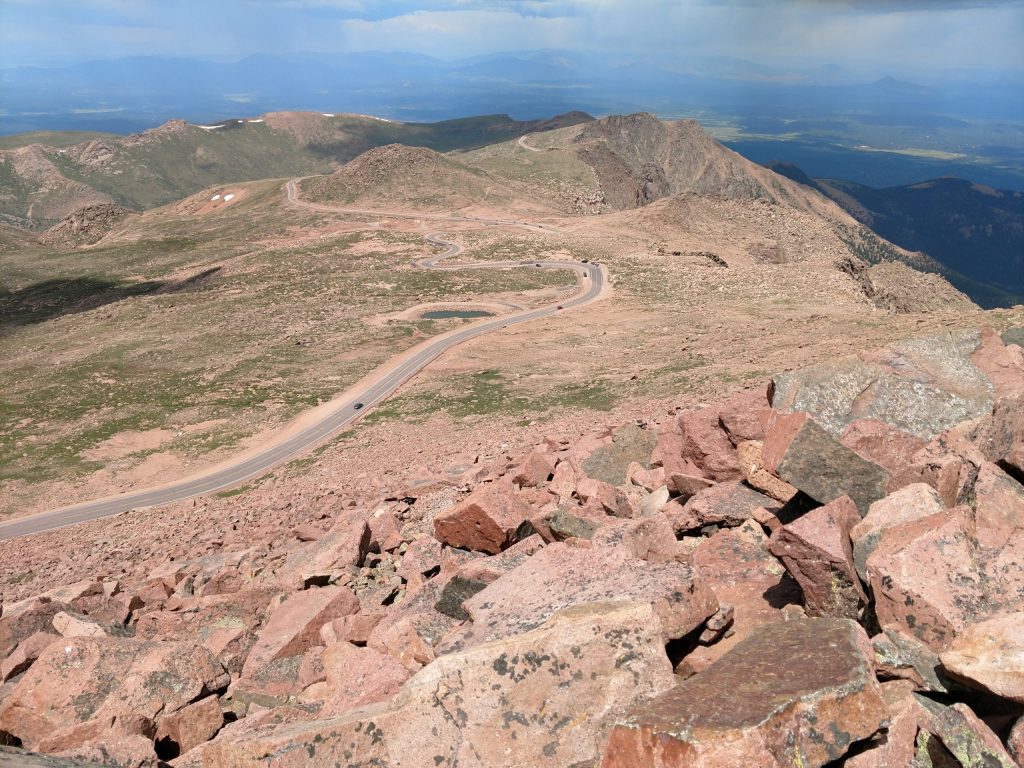
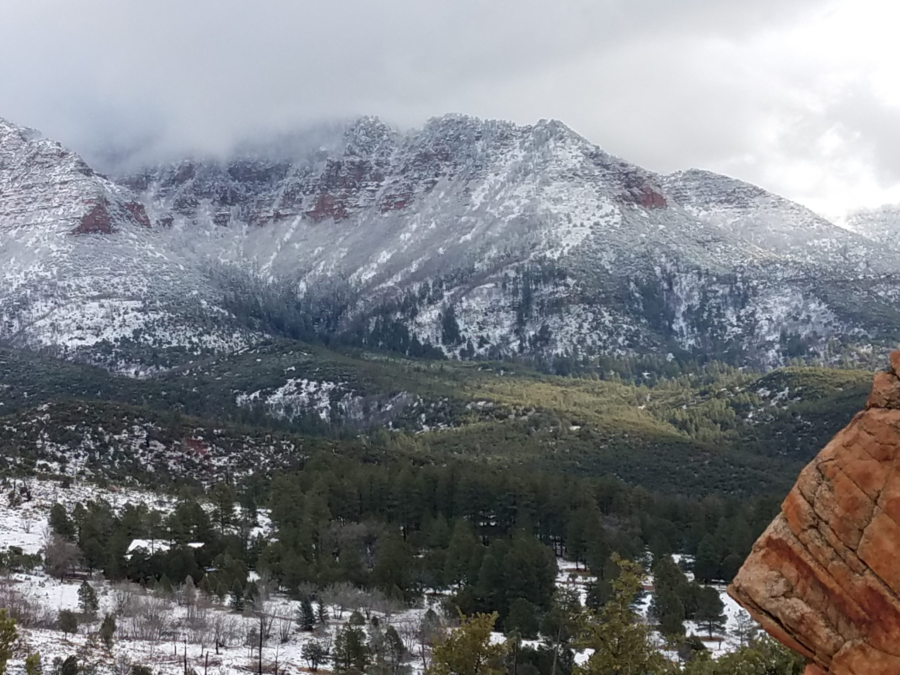
The Mogollon Rim is an amazing land feature slicing across the lower half of the state, creating a massive rim with the upper plateau to the north and the lower elevation sprawling South. This area under the rim is where we spent the week hiking, bushwhacking, and looking for Elk. Using the Motel 6 in Payson as our “base camp”, we explored and tried new areas, which we thought might be promising, each day. We would get up at about 0430, layer up our clothing, grab our gear, grab coffee and a quick bite on the way, heading out for the hills.

Some of these “hills” under the rim started at around 4000 to 5000 feet and work their way steeply upwards to the Mogollon Rim escarpment rising at about 8,000 ft. We spent about 10-12 hours exploring, hiking in, hiking up and down and around. Each night we’d come back to the motel, unload gear, more often than not, dry gear (the bathroom had an awesome ceiling heater which made quick work of drying everything from packs to boots), make lunches for the next day, and repack. We would go out for dinner in the evening, talking and exploring the extent of the local dinning opportunities.

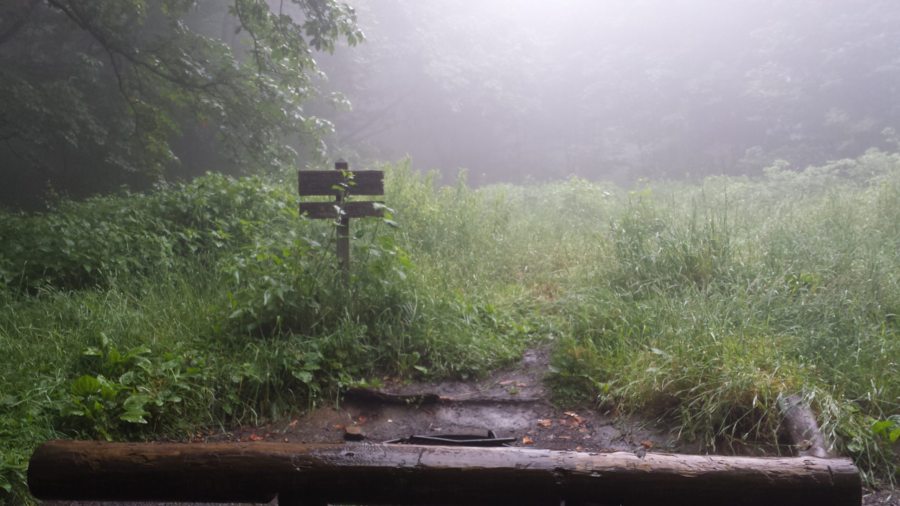
The weather for the first couple of hunt days, not unexpectedly, changed overnight from sunny and comfortable to overcast cold with rain and/or snow (depending if you were trying to keep warm, dry, or both). The rain and wetness turns the normally dusty dry red Arizona “soil” into a magic thick clay goo which you could make bricks from. There were unavoidable patches of bare ground you had to cross and then the mud demons would stick to the soles of your boots, building in thickness until it was hard to walk, then need serious work to scrape most of it off. The weather cleared nicely for a few days, then we were blessed with opening-day type weather on the last day. 

While no elk were harmed in the telling of this tale, we were fortunate enough to see lots of elk, elk sign, and plenty of signs of other wildlife including mountain lions and javelina’s (or peccary). I think it was the end of the second or third hunt day when I saw my first elk close up. We were coming in to Payson at the end of a long day, traffic was backing up a little right next to this local golfing neighborhood. Then I saw what was slowing the cars down. There was a small herd of elk off the shoulder of the road. I pulled over and got out to take a closer look. I was able to get within 50 feet of them before they moved off a little. In town and so close to the road and neighborhood, it seemed they knew they were fairly safe and not too worried about spectators watching them. It’s one thing to see them a couple thousand yards away, it’s another to be close enough to almost touch them. 

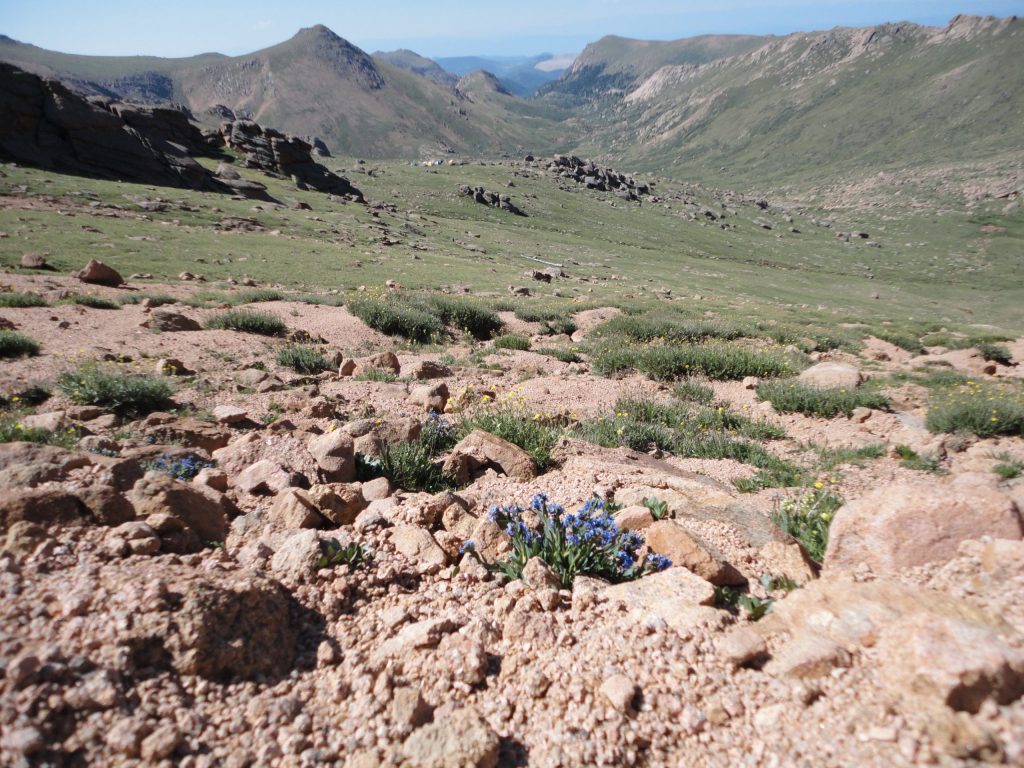
The fourth day we arrived early to a different hunt area and jumped a herd of elk bedded down in a small box canyon. I was on point, walking quietly down a path along the rim of the small box canyon in the predawn glow. I noticed some very symmetrical V-shaped “branches” which seemed to be looking at me. I paused, frozen still, while trying figure out what I was looking at in the grey morning light. Finally the bull elk turned his head. To my surprise, the one turned to many as at least a dozen cow elk stood from where they had been bedded down in the brush around him. I hunkered down and quickly changed places with my brother. By the time he go to where I had been the one bull elk had grown to three, and the herd was on the move, dispersing and opening the distance between us as they blended and faded in to the brush as they moved away. 

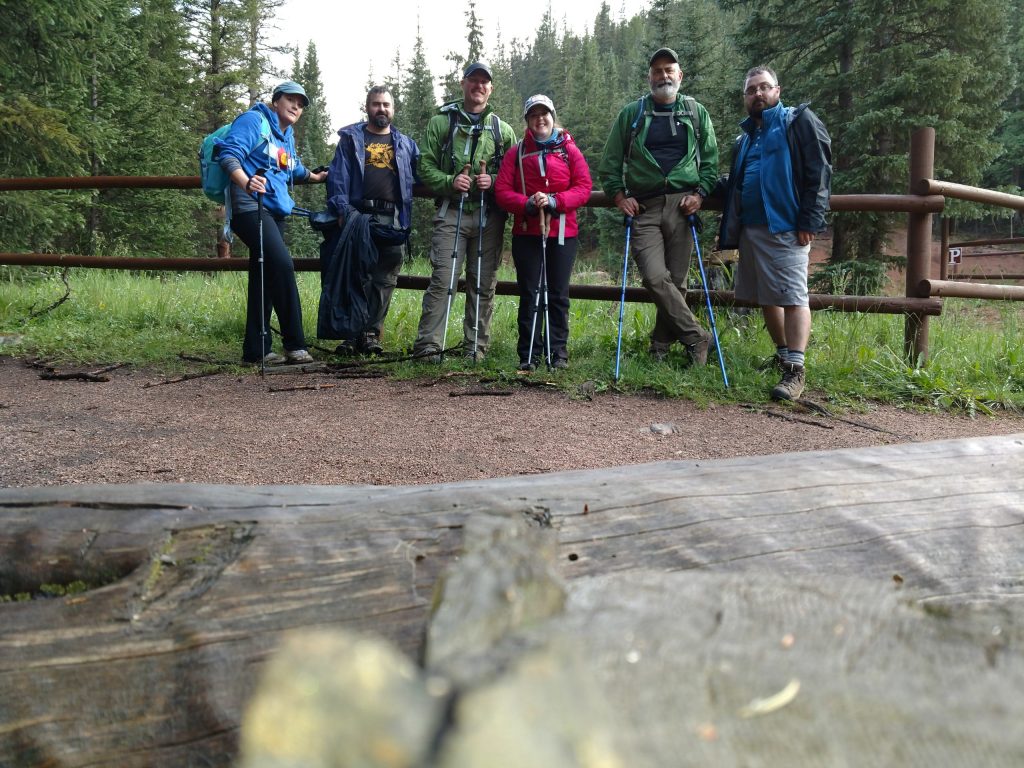
My brother and I live in separate states, so being able to spend some of this quality “guy” time together traveling and exploring together really made for a special fantastic trip. Overall we probably hiked around 20 miles of various parts of the Arizona back country, some on trails (including small incidental pieces of the Arizona Trail running under the Mogollon Rim), most off trail. We were able to experience viewing some great wildlife, toured the Shoofly Village Ruins, explored the Tonto Fish Hatchery,and poked around the dammed lakes and rivers around Tortilla Flats and Phoenix. We even did a little antiquing in Payson. Even if he wasn’t able to fill his hunt tag, I know he enjoyed too, being out in the wilderness exploring.

——

Travel Footnote:

If you ever end up in Phoenix-Mesa, and are looking to book a cheap place (ya gotta luv travel booking through the internet) for your last night in Arizona, while you wait for your early morning flight out, there is a special little sweetheart of a motel called Knights Inn-Mesa, I really, really, could not offer a recommendation. At all. Ever. They try, kind of, but no, don’t do it!

#

Ready or not, here we go!

My backpack is packed inside a suitcase, waiting by the front door. In the morning we leave for an adventure. The last time I did this I ended up hiking on a broken leg for four days.

My brother and I are heading west in the morning to explore the wilds of Arizona for several days. In all fairness, last time I thought I had just sprained my ankle. Note to self; don’t fall down a mountain this time.

#

Hiking South Carolina – Lee State Park

Lee State Park is a great place to take a walk and unwind a bit. It’s a good mid-sized state park of 2839 acres along the Lynches River near Bishopville in the eastern midlands of the state. The park has several short (under a mile) easy hiking trails near the camp grounds at the visitor center, including a nice elevated boardwalk through the wetlands. There are also several miles of horse-only trails. The Loop Road trail however is a good five miles and takes you past several of the parks artesian wells as it circles the park. This park is one of South Carolina’s first sixteen State Parks originally created during the 1930’s great depression by the Civilian Conservation Corps. Many of the original buildings remain. During my visit the weather was cool (no bugs!) and the fall foliage was turning which made for a really nice walk with Radar.  We walked the Loop Road and Boardwalk trails. This making his second hiking trail, Radar seems to enjoy hikes and really does a good job staying close even when horses and other dogs show up on the trail. We enjoyed a light trail lunch and drank from the artesian wells as we casually walked the trails and enjoyed the peaceful day. We followed up the hike with a short hammock nap. With no tempting wi-fi, Lee is a great place to disconnect and unwind.

Favorite Time of year: I must go with the fall season. Watch the weather for Lynches River levels.

Things to Know: They keep it pretty simple at Lee, no wi-fi, nice facilities but limited extra resources makes Lee a quite place to relax.

Camping: Site and RV camping is available at Lee, you can use the toll-free for reservations, or information (Reservations Required). Group primitive camping is also available but you will need to call.

Pet friendly: Pets are allowed in most outdoor areas provided they are under physical restraint or kept on a leash not longer than six feet

Getting There: Lee is in the Eastern midlands of South Carolina, West of Florence and East of Camden, just off highway 20. It’s about a 2-3 hour drive from the Charleston area.

#

Outdoor Tips – ‘Water, water, everywhere, Nor any drop to drink.’

The first really long hike I remember doing was a summer time trek in Florida’s Ocala National Forest. Planning by the group leaders was ongoing for months and had been meticulous. Detailed menus, easy mapped sections each day, we even had designated campsites for each night with potable water sources so we didn’t to carry need heavy water filters to treat water from the wild. It’s amazing how simple things multiply. For whatever reason we started out at the wrong trail head. This added way too many unexpected miles to our first day hiking in the Florida sun, from which we never really recovered. We all ran out of water miles short of the first campsite. One of my most distinct memories of this early backpacking trip was passing the numerous ponds, teaming with wildlife, and no way to treat water to drink.

Today water treatment technology makes it so easy to be prepared and to gather safe drinking water from the field. There is really no reason not to have something for water treatment tucked away in your pack.

The smart folks at the Centers for Disease Control and prevention tell us the things in back country water which will hurt us (this means pooping on ourselves, throwing up, and/or the joys of stomach or intestinal cramps) are called pathogens, and they fall in to three primary types: Protozoa (little bugs), Bacteria (littler bugs), and Viruses (littlest bugs). I know technical, right? The bottom line is you can’t see these guys. Despite folklore, you can’t just look at a water source and say “oh this looks good, no need to filter this water!” Any water from a wild source should be suspect. The real question is how much risk am I willing to take, or worded differently, how close am I to the end of the trail where I can get to a bathroom?     

Outdoor Skills – Water Treatment Methods

Why use a water treatment when outdoors? The short answer is there is simply no easy way to tell if a water source contains disease-causing microorganisms. There are people who will claim they have been drinking untreated back country water for years. At best, this can be a high risk practice. When pulling surface water from any lake, stream, or river, anywhere water is exposed, it is susceptible to contamination with microbes and viruses. The best practice is to treat water from any source. Always treat all water.

When heading out for a trip where I know I will be pulling water from a natural source, I always try to have at least two methods of water treatment. A backup method helps you be prepared when your primary method fails for whatever reasons. There is little worse than running out of water and not being able to safely refill your water bottles. We’ll take a look at some of the basic treatment methods and some of pros and cons of each.

The oldest and simplest water treatment method is to boil your water. Fill a container with clear water (strain as needed) and place over a stove or fire to bring the water to a rolling boil. Let cool and you’re done. This is a great backup method when you have a stove with you. Some of the down sides to this method are it takes fuel and time. You may need to carry extra fuel if you are going to plan to boil all the water for your trip. You also need to take time to let the water cool. The boiling or very hot water can deform some plastic water containers and scald skin.

Filtration is a great and very popular primary water treatment method. There are a number of filtration systems including straws, pumps, squeeze, and gravity systems available. Basically filtration removes biological contamination through a physical filter. So the most important thing to know here is how small are the particles the filter will take out. In this case, smaller is better. You want to start with nothing larger than 1 micron to filter out the the little bugs, like Cryptosporidium & Giardia. But you really need to move to a filter of no more than 0.3 or 0.2 microns and go smaller if you can, ideally 0.1 micron, to remove most of the other bad littler & littlest guys like Campylobacter, Salmonella, Shigella, E. coli and enterovirus, hepatitis A, norovirus, rotavirusGravity bags are great for easy and a high volume of finished water. Pumps are good for smaller groups and shallow water. Squeeze filters are great individual filter systems. The gravity systems are difficult to use with shallow water sources and can be expensive. A lot of pumping can be fatiguing. Squeeze filter are susceptible to damage from freezing due to the micro-tube filter media.

Chemicals are a good alternate plan for water disinfection and can be used with filtration to provide better results as chemical treatments are generally effective against most biological contaminants. Mostly chemical treatments are limited to some form of iodine, chlorine, or chlorine dioxide.  Chemical treatments do require an amount of “soak” time to work effectively, typically at least 20-30 minutes. So you can’t treat and drink right away, you must allow time for the chemical to do it’s job. You must follow the manufactures dosing instructions. Some people may have or develop sensitivities to the chemicals and they can leave an unpleasant aftertaste.

A couple quick tips.

Always try to pull water from the visually cleanest part of the water source. When filtering, use a pre-filter to reduce the crud getting to and clogging the main, finer filter. Keep your clean water containers separate from dirty water containers. Powdered drink mixes with citric acid can help neutralize or mast the aftertaste of chemical water treatments – after the required wait time.   

#

Table Rock Revisited

Of course, it always starts out easy enough, this hike, with the wooden board walk and paved walk ways, winding around the gentle water falls cascading down the mountain. It’s really not far to the trail junction where all the trails head in different directions. Pick your poison as they say. We turn left, and head west, along the Pinnacle Mountain trail for the start of a two day trek through one of my favorite, but probably one of the most challenging, state parks in South Carolina, Table Rock.

I am lucky to take another group of new backpackers out in to this wilderness again. Our overnight trek will loop around the outer perimeter of the park in a +-12.5 mile loop. Honestly, the distance is the easy part. We will gain and loose thousands of feet over the next mere twenty four hours. With the weight of my pack, it feels good to be back on the trail again. It’s been a couple years since I was here last (with my son and daughter, it was late fall I think) and the trail is familiar, yet some how different. We slowly climb as the trail winds towards Pinnacle Mountain. Our goal is the campsites just out of the west end of the park on the Foothills Trail. It’s only 5 miles away. The trail generally keeps climbing, but we’re moving slow. We pass under a small water fall. Some of the spur trails are closed and there seems to be a lot more  green underbrush growth than I remember.  We hike on to the the west to Bald Knob Outcrop and take a needed break. The view here is amazing in the late afternoon. Inspirational probably really doesn’t describe it well. I would love to sit there and watch the sky roll slowly from baby blue to a darkening deep purple as the night advances, but it’s getting late, and we have miles to go before we rest. Really, miles still. We reach the Foothills trail spur from the Pinnacle Mountain Trail and begin our 800 foot decent in to the valley where we’ll spend the night. Every step down hill will be a step up hill tomorrow as we come back this way. We reach our camp with just enough light to set up camp, make dinner, and relax a little before the darkening deep purple rolls to the blackness of night. The ground is hard and uneven but we’ve hiked our five miles in just under six hours and I sleep well anyway.

It turns out there was a wildfire a last year which burned over 10,000 acres around Table Rock and Pinnacle Mountain. This explains the charred and burned trees, and the subsequent rebirth of the green undergrowth I’ve seen. Kind of like natures way of re-freshening things. Unfortunately there are also signs of beetle damage killing back some of the trees. And there is plenty of recent storm damage with yet uncleared down trees crossing the trails. There so much unrecognized work in maintaining trails, most people take clear trails for granted.

I’m up early before the sun, I pack and eat while the rest of the crew is starting to stir. Morning camp chores need to be done, water gathered, and sleepy hikers motivated. Finally we are hiking, in a light morning drizzle of course. It wouldn’t be camping if it didn’t rain. We hike back up that 800 feet now to regain our trail and on to the top of Pinnacle Mountain at 3415′. We are painfully slow this morning. The slow grinding up hill takes it’s toll on time. I fuss but it’s really all good, I think. The east bound Ridge Trail is good to travel and regain some time. I love being on the ridges. It’s just getting to them which is the challenge. We’re making good time. We’ve planned to meet our main group of day-hikers on Table Rock for lunch, so we’re hiking under a schedule, which can add a pesky “time” element to things. We make Panther Gap, thank goodness. Here we drop our packs and just take food and drink with us for lunch. Two miles to go. The Table Rock summit is guarded by the approach to Governor’s Rock. You need to climb now to get to Governor’s Rock, then you’re allowed to climb some more to get to the Table Rock summit of 3124′. It’s really kind of amazing when you round one turn in the trail to face a 50′ rock climb, only to crest it, and look up at another. Governor’s Rock is a bald outcropping which offers an amazing view of where we came from. Sitting on the warm rock face, Pinnacle Mountain to the west and the ridge between look so green and pleasant. We finally reached the summit, passing our day hiking group on their way down. The overlook views from atop Table Rock allow you to see virtually the entire South Carolina Piedmont region, almost all the way back to Columbia, on a good day, when the clouds don’t roll in. We had a few moments of great views before the clouds wrapped around us. Alas, lunch is over and we must go, we have a couple miles to go back and pick up our packs, then another couple miles to get down and off trail before dark. we’re descending 2000′ in those sweet short four miles.

While this Table Rock Trail is rated “Very Strenuous” (I may just have a few other special words to describe some of it), I do find it rewarding to take this hike and bring others along to share the joy of these special mountains. Hopefully this will warm the embers of outdoor exploration in some of these these new hikers, the way it has in the past with the young hikers before them. I’ve hiked these mountains many times now, at the end of the day you know you’ve done something, okay maybe not, but even tired, with aching knees and sore feet, there are times I would rather be on the ridge, walking under the shade of the forest canopy, than anywhere else.

#

Hiking with Radar

I just came back from a great weekend camping with Brenda and Radar at #CroftStatePark in the SouthCarolina up-state. Brenda rode with friends and I took Radar on his first ever, real trail hike! We covered about 11 miles in one day with 8.5 of it along the Croft Passage of the Palmetto Trail. While he and I have gone for walks before, this was Radar’s first real hiking on a trail in the woods venture, and he did really really well, he’s such a good boy!

Pikes peak through The Garden of the Gods

There is snow on Pike’s Peak

According to the Denver Post, Pikes Peak picked up some snow this weekend and commented as a fitting indication of the start of the changing seasons.

Last year I hiked to the peak of this amazing mountain with my family and absolutely loved it (now I’ve been able to catch my breath – at the time I think I probably just liked it). I loved hiking this mountain and would hike it again and again if I could.

The new piece from the Denver Post was one of those blips which shows up in your news feed. It reminded me how thank full I was then and am now. So many thing can change in a persons life over a year, I think it’s important to recognize the good things which happen and the good people which happen to you.

#

Outdoor Tips – Got Milk?

If you want milk on your next travel trip, try taking a shelf-life or shelf-stable type produce. I’ve froze half pints of Parmalat milk which comes packaged like juice box drinks. This type of milk package, unopened, has a long un-refrigerated shelf life and is good for camping and backup food supplies where weight isn’t an issue. Because it is real milk, it tastes better than powered and the kids like it. Freezing the milk conserves on ice. I did this on a canoe trip and 24 hours after leaving home it was still ice cold and partially frozen.

#

Pikes Peak

Using “If-Then” Thinking to Achieve Your Goal.

When you first get one of those epic, crazy, fun, adventure ideas in your head, your thoughts may shift to all the problems you think you will face. This can be overwhelming and likely may cause you to look elsewhere for something easier to do.
 
I recently read a management tip-of-the-day which struck me as appropriate to adventure goal seeking (or any other goal seeking for that matter).
 
First start by considering your goal (say, “I want climb Pike Peak”). Then list the obstacles you expect to face along the way (“Lack of air at high altitude”). Listing the goal helps you focus on the objective. Listing out the problems in getting to the goal helps takes them from the enormity in your imagination and makes them simple word problem statements, each to be addressed. Yes, there are obstacles, but they are typically finite and each problem can be worked.
 
Next, frame what you will do about these obstacles as “if”-“then” statements. Look at the “If” statement first. If this is a problem – what are some solutions, workarounds, or fixes? The you can use these solution towards your “Then” statement(s). To address the lack of O2 at high elevations, for example, you could tell yourself: “If there is a lack of available oxygen at 14k feet, what are some solutions to overcoming this issue? I can train to compensate?, can I carry extra O2?, etc.”
 
Then you can build your “Then” solutions.  “If there is low O2, Then I will use hypoxic training, Then I will  develop an altitude acclimation plan, Then I will carry portable oxygen canisters, Then I will have a exit plan for altitude sickness.”
 
By using if-then statements, you can think through what will get in your way and make a plans to address or overcome them and reach your epic crazy fun adventure goals!

#

Skills – Rain Gear

I once hiked three days in the rain. Actually, as much as I hate to admit it, I’ve hiked a lot in the rain. It’s not something I strive to do, but if you hike long enough and far enough, you will get rained on.

My brother recently asked me “Ok, so what light weight rain gear do you use/recommend?” I thought this was an interesting question worth exploring because I think most people consider rain gear kind of like a first-aid kit. You really need to carry one, but hope never to need to use it. Unfortunately, I’ve used my rain gear way more than my first-aid kit (or is that fortunately?). Everyone has different way of hiking and reasons for picking the gear they do, here is my current rain-gear plan.

My basic inclement weather protective clothing philosophy says; if it rains, I’m gonna get wet.  Now, that’s not to say I don’t carry precipitation protection, because I do. I just acknowledges the fact when it rains, things (including me) get wet. The real trick is not to stay wet or get cold and wet. No matter the season or the weather, I feel it’s very important to have a good wicking layering system. Then you can add an appropriate rain shell for those moist days. This will help keep you both warm and dry(-ish).

I do have a heavier rain suit set (jacket and pants), but it weighs a pound or two so I reserve it for the colder weather now. If I know the rain will be light, I’ve hiked with an umbrella which was pretty nice but can be awkward to manage if you are using trekking poles. There are a lot of options to play with. If I’m of the trail for several days with rain, I always try to keep something dry to change into in the evening for sleeping. In the morning I’ll change back into my wet  hiking clothes and try my best to protect my dry night clothes. As long as I’m hiking and moving, I can generate enough body heat to keep warm. As with most things, rain gear is a compromise. You want to stay dry but the rain jacket needs to vent sweat and heat when hiking. Otherwise you end up dry from the rain but soaked in sweat.

I’ve settled on a light rain jacket for my outer layer and a good pack cover for my pack. Some people will advise you don’t need a pack cover if you put all your gear in a plastic bag in your pack. While true, however now your pack is getting soaked and the added water weight will very likely exceed the few ounces of weight of the pack cover. The more my gear stays dry the happier I am later.

My current go-to rain jacket for the trail is a lightweight polyester Eddie Bauer rain shell I picked up a few years ago. It comes in at about 5 ounces and packs down to under a baseball size so it really doesn’t take up a lot of room. For 3 season hiking, it fits as the final shell layer. It’s versatile enough to work well to cut the wind on dry days and keep most of the water off my upper body on wet days. In the summer I lean towards hiking shorts, so I just let the rain go and don’t worry about wet legs. I mostly use wool socks  and they help with managing the wet feet.

I guess I worry less about the rain and getting wet now than I did when I first started hiking. You need to play with different options and figure out what works for you hiking style, and enjoy the journey the best you can. Rain or shine.

#

Page 4 of 7

Powered by WordPress & Theme by Anders Norén