The journey of a thousand miles begins with the first step, and this is mine.

Category: Outdoor Tips Page 1 of 2

10 Essential Items

Heading Out? Don’t Forget to Pack These 10 Essentials

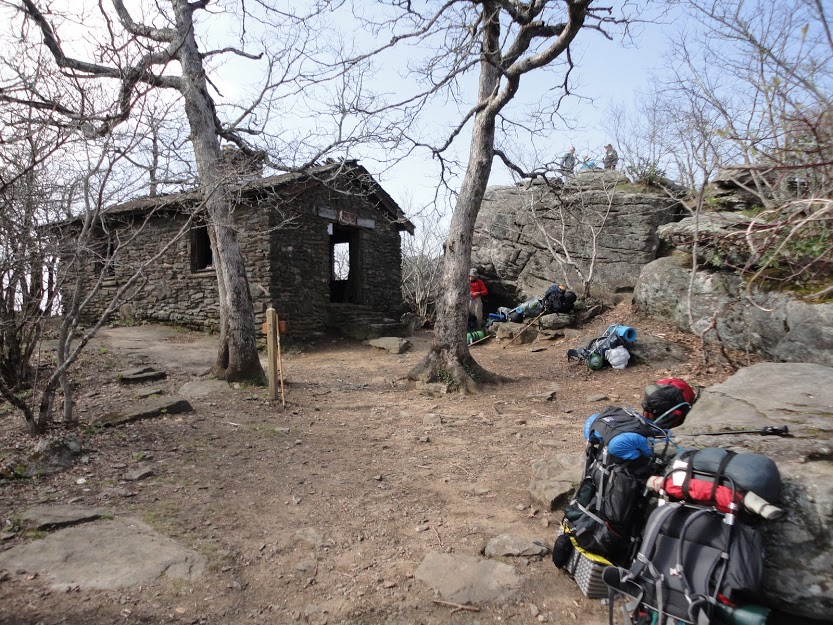
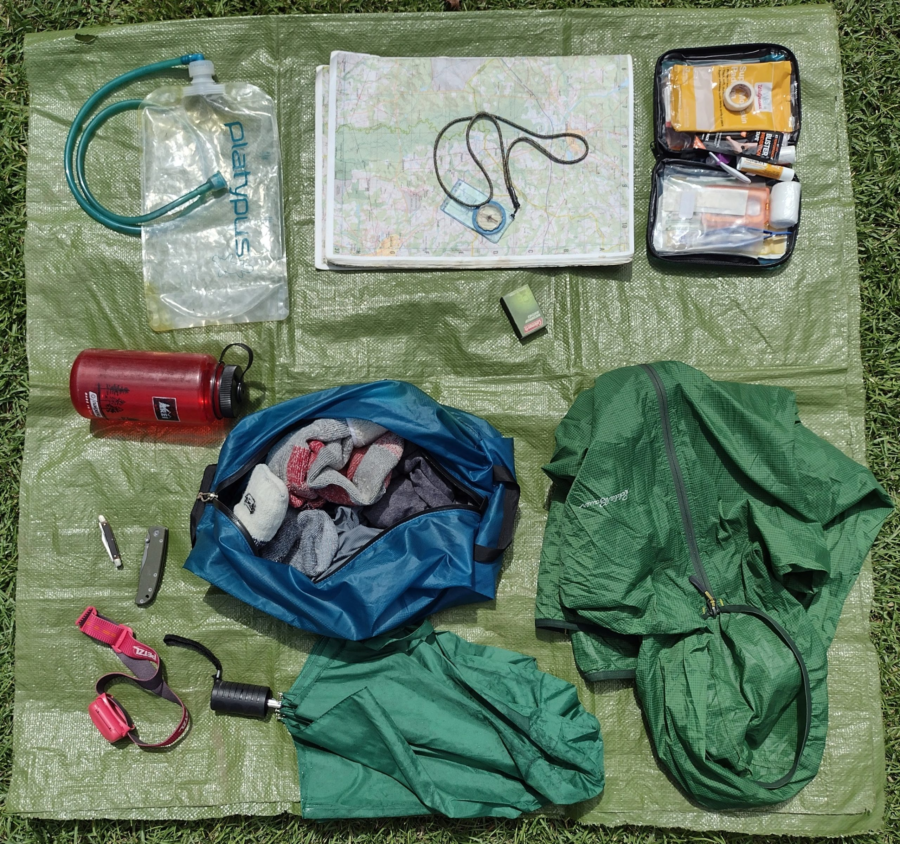
Whether you are heading down the trail for a quick hike or gearing up for a long trek, you don’t want to forget these essential items. You’ll need to start somewhere and this list is a place to start the discussion. There are many versions of these essential things and infinite options for each item. Of course you will want to scale down or up these items based on your specific outing needs. For example, the first-aid kit I take with me on a week long backing trip is vey different from the first-aid kit I take with me for a local day hike. So lets walk through the 10 essential items.
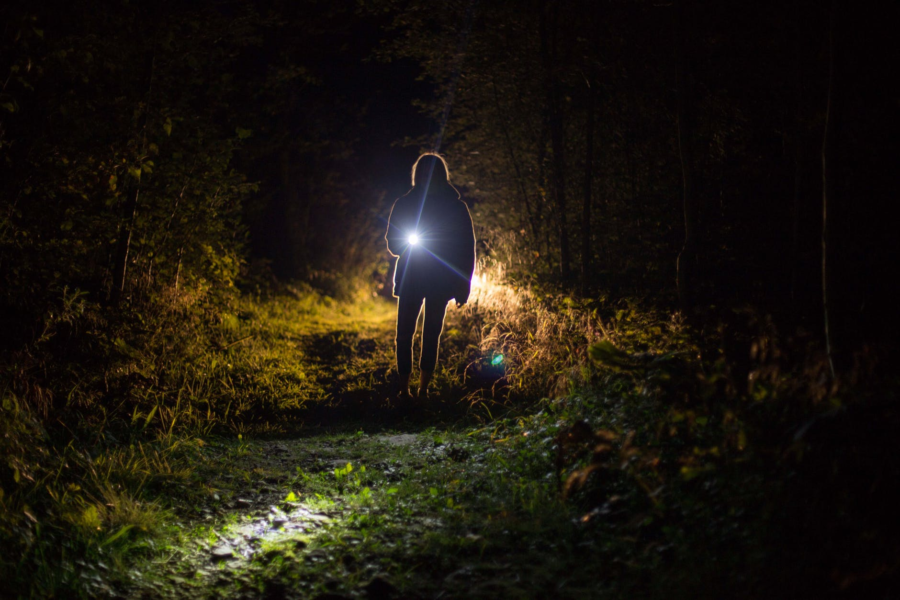
Flash light
For me, a simple headlamp works well for almost all situations here. Light weight and easy to pack even for a day hike when you maybe coming in around or after dark. Seldom have I ever needed a handheld style flashlight when hiking. As a trek pole user I prefer the headlamps as it keeps your hands free for other purposes. I would not recommend overly fancy lights or headlamps needing special or button batteries. I’ve seen hikers left in the dark because they couldn’t find replacement batteries in town. Keep it simple, AAA or AA batteries are every where. For short hikes, just make sure you have fresh batteries. For longer treks maybe pack an extra set of batteries.
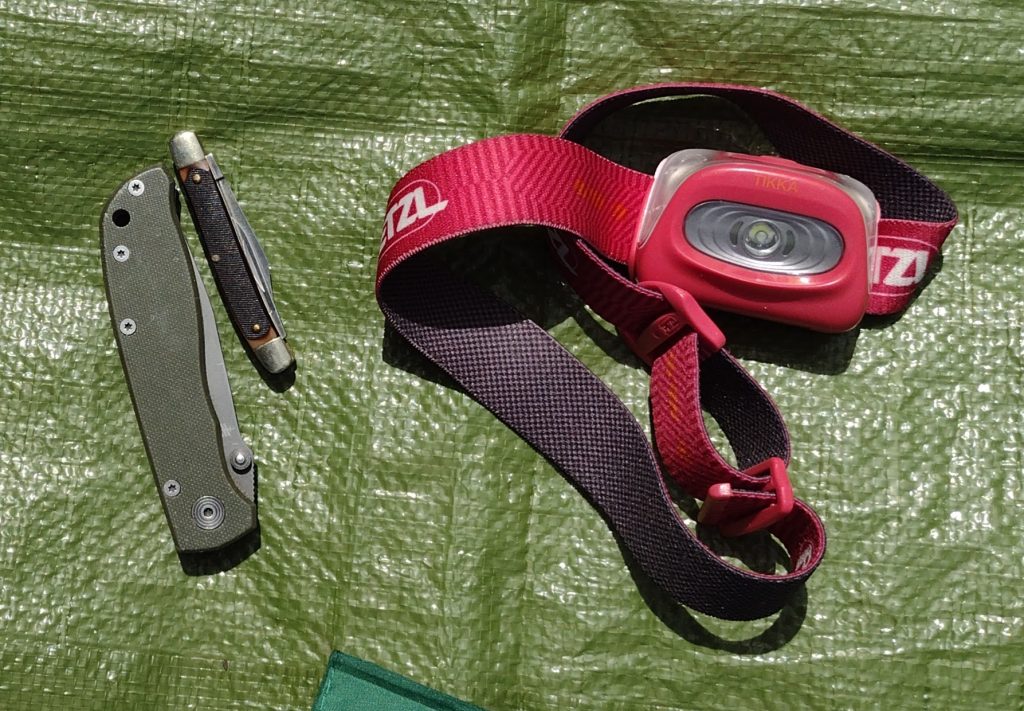
10 Essential Item Headlamp Knife

Pocket Knife
Useful for light cutting and trimming. My primary hiking knife is a small simple folding two blade pocket knife. It’s useful for cutting moleskin, opening meal pouches, chopping beef jerk, even getting out the occasional splinter.
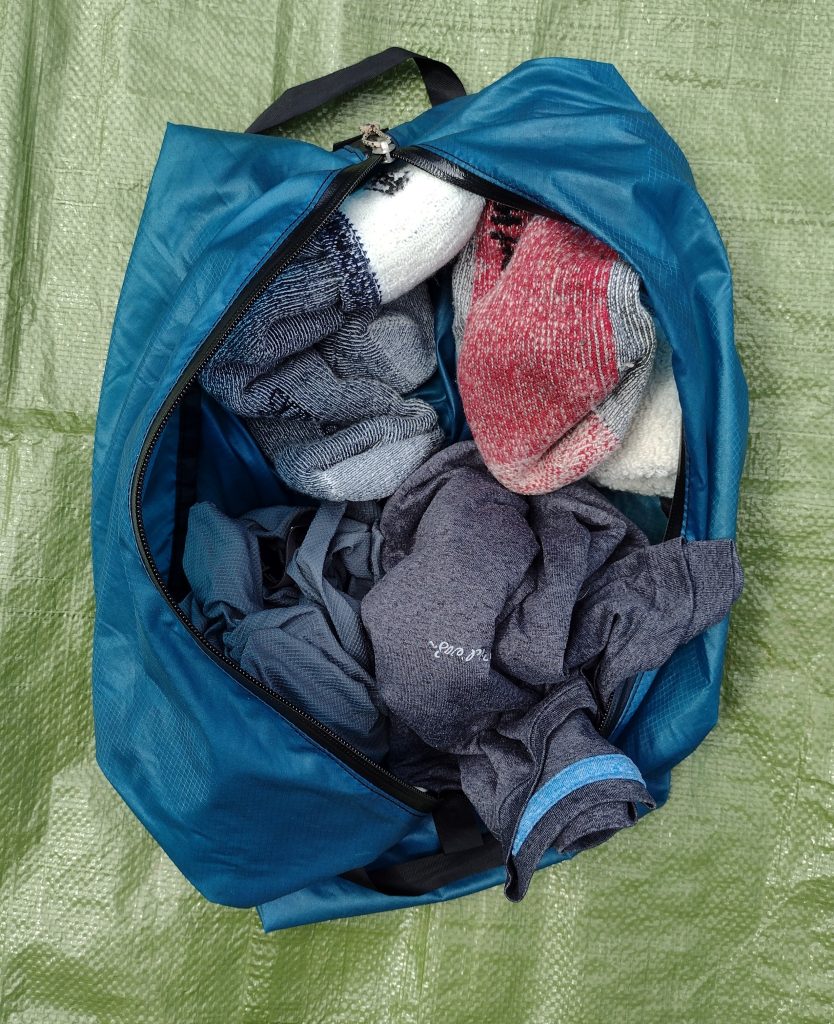
10 Essential Item Extra Clothes
Extra Clothing and Socks

Extra Clothing
This can be a simple change of socks, or a change of underwear, or several days of layered clothing. For a local day hike, I might take an extra pair of socks if I thing the trail will be wet. It’s nice to change in to dry socks for the drive home. For backpacking, a hiker travels on their feet so socks are important. For clothing, I usually only pack a change of base layer/underwear, but will always take at least 3 pairs of socks. One pair for today, one pair for tomorrow, and one pair only for sleeping. I try to keep my sleeping socks clean, dry, and reserved only for sleeping. I’ll hike in a pair, then swap them out the next day. My yesterday pair will hang and dry/air on my pack and become my “tomorrow” pair.

First-aid Kit
You can pick up a simple first-aid kit just about any where not much bigger than a deck of cards or even make your own. However you really do need to know how to use what you pack. If you’ve never had any first-aid training, look up an organization like the Red Cross for training in your area, you can even do some of the training on-line. For a day hike a small zip-lock bag with a bit of moleskin and a few bandages is probably enough to get started. For longer hikes I carry a small group kit (I often hike with small groups) containing things like bandages, gauze pads, tape, extra mole skin, antibiotic ointment, ace wrap, KT-tape, some simple over-the-counter meds like aspirin, Tylenol, Ibuprofen, Benadryl, Imodium, small scissors, small tweezers, and the such.

10 Essential Item 1st Aid & Matches
First Aid & Matches

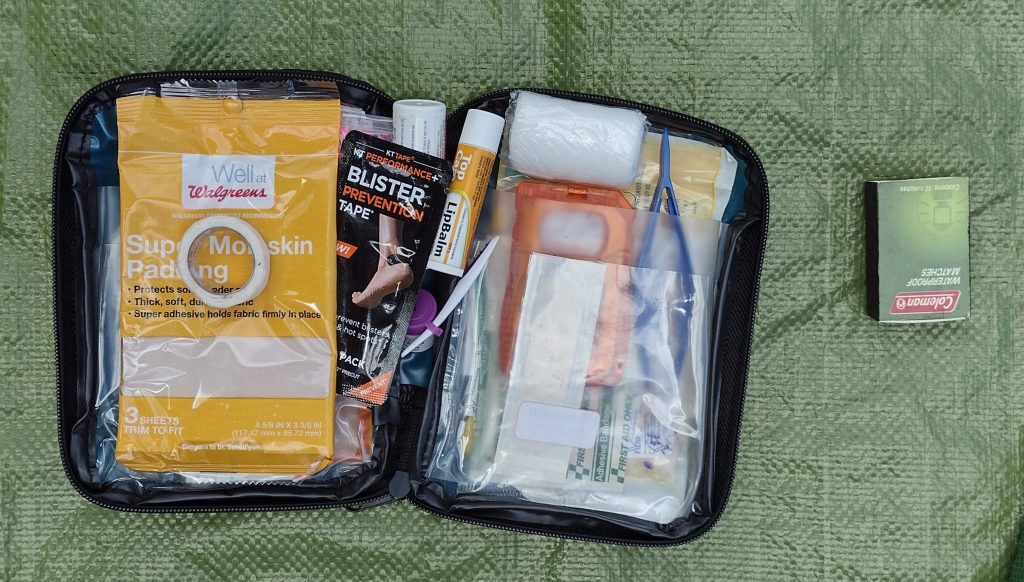
Matches or Fire Starter
What’s really needed here is a way to start a fire incase you get lost. This is a survival type situation item here. A butane lighter with some sort of fire starting aid like dry lint or tinder, in a small container works too. My stove has a piezo lighter/igniter, but I also carry a small butane lighter or a small box of water proof matches, just in case the igniter breaks (it has).
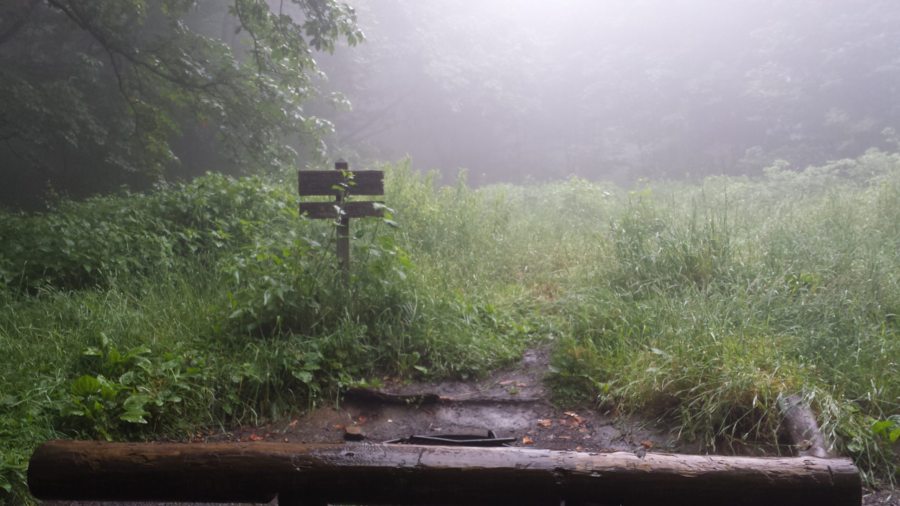
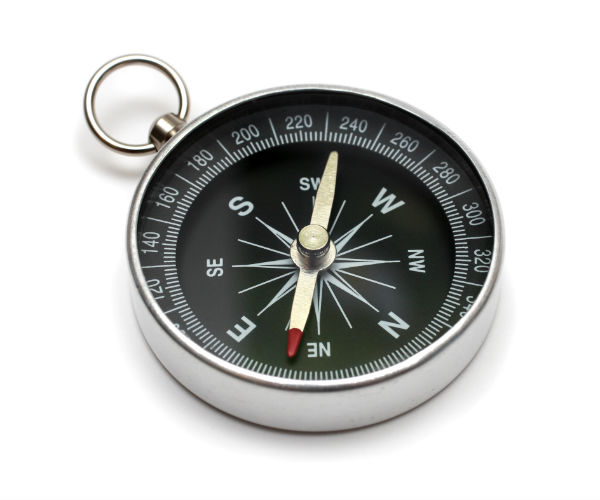
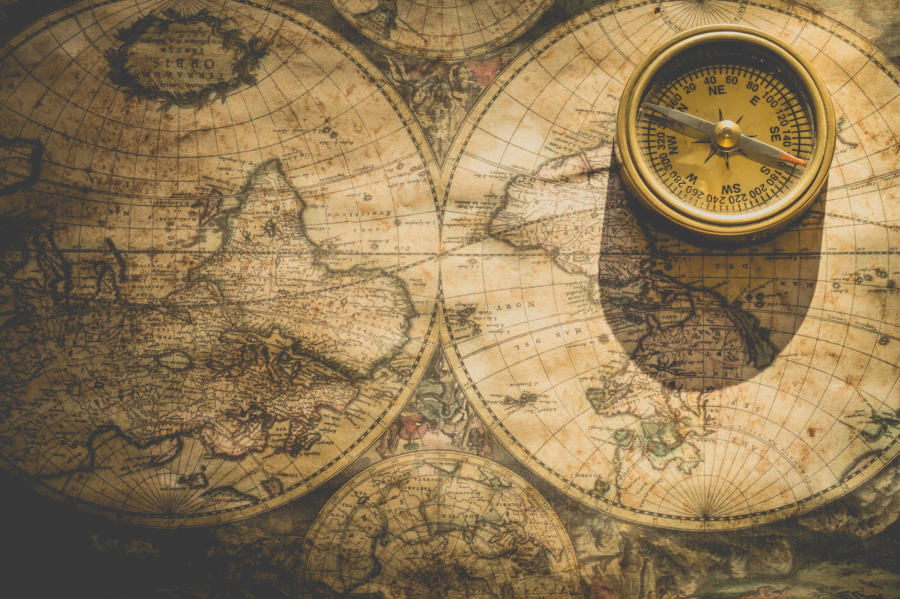
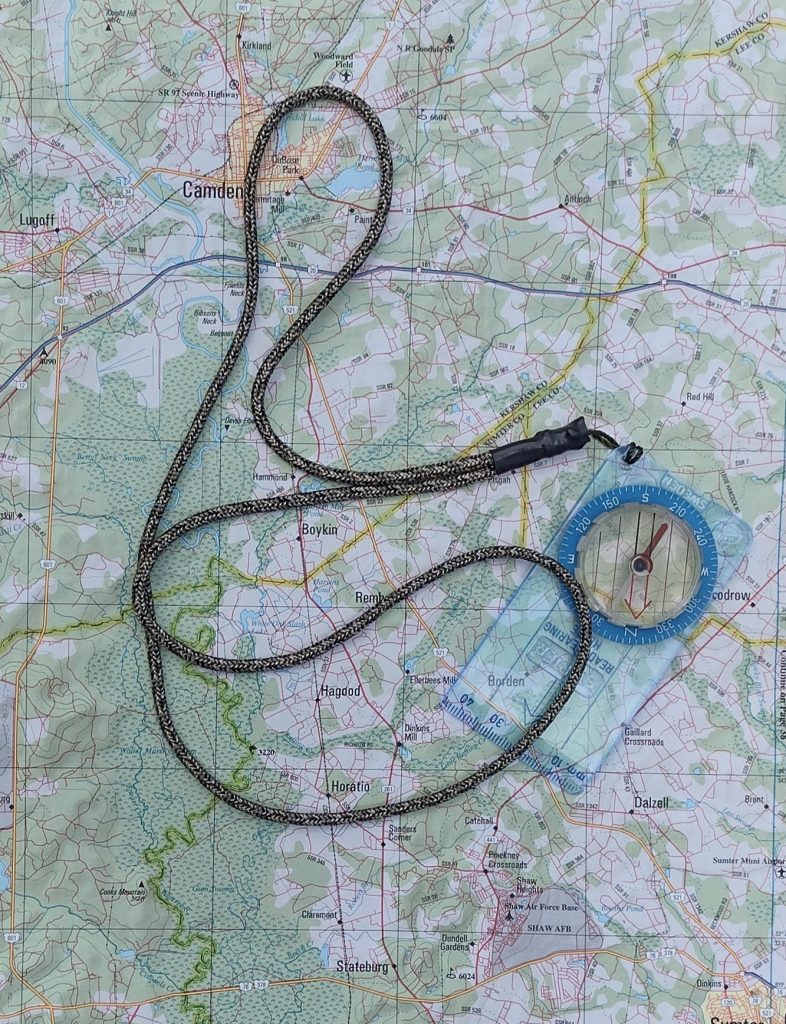
Map and Compass
Even when starting out on a well marked trail you need to know where you’re headed and be able to navigate basic directions. I did a day hike from Newfound Gap with my dad a few years ago in the Great Smokie Mountains. We came across a hiker heading our same direction. Long story short, he was lost on a well marked trail and had to backtrack to his start. If you’re using your cell phone or an app as many people (including myself), a compass is a great battery free, water proof, quick and easy to use tool to aid you in finding your way and help keep you from getting lost. This is the compass always take with me backpacking. It’s a older Silva Starter compass I’ve had for years. It’s simple and works well enough to navigate with.
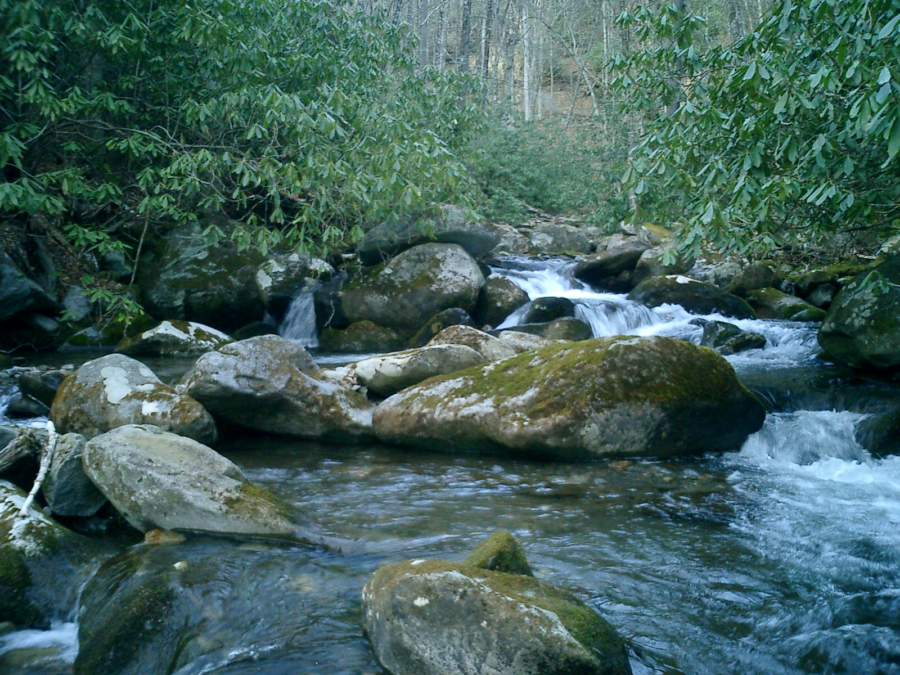
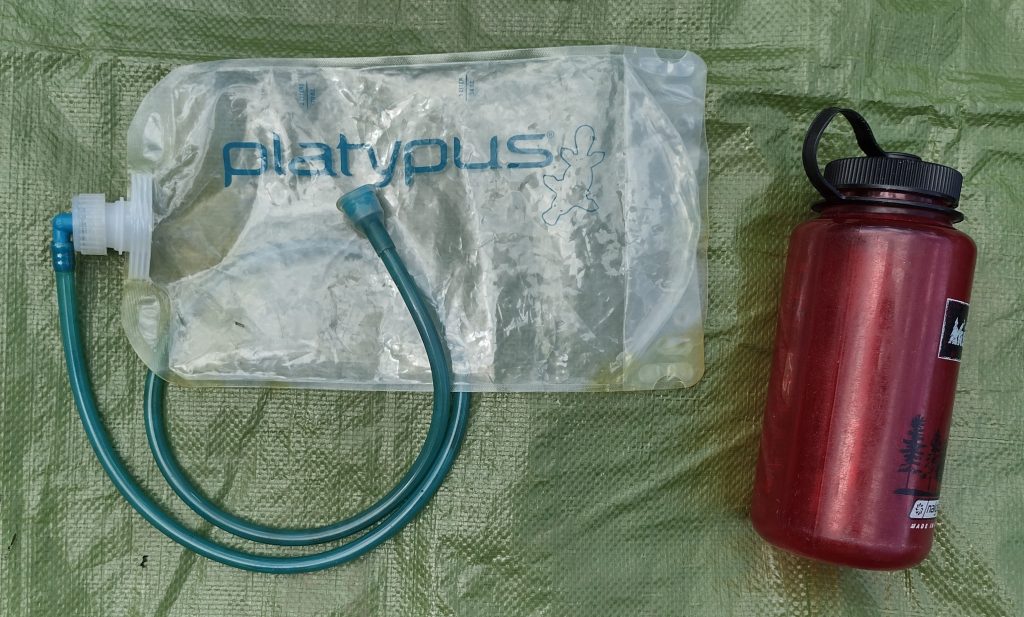
10 Essential Item Map & Compass
Map & Compass

Water Storage
For a simple day hike I typically use a standard 1-liter Nalgene style bottle or something of equal capacity. When backpacking, my number 1 recommendation and go-to is the Platypus hydration bottles. I always carry two Platy 2-liter flexible bottles as part of my hydration system. They are very light, tough, fold flat when empty and form to the pack contents. Having two of these bottle gives me flexibility in my water carry based on weather and trail conditions for only ounces. For long treks where potable water may not be available, you also need to consider water treatment options.

10 Essential Item Water
Water Storage

Trail Food
This is snacks to maintain hiking energy between meals. Any kind of favorite trail mix or granola is a nice treat to nibble on as your walking. This can be a simple homemade trail mix or can also be something like trail snack bars such as Cliff, RxBar, Nature Valley, & PowerBar. These generally pack and keep well. Watch out for some of the snack bars with chocolate drizzle or coatings, when the weather is warm they can be a mess. Pack an extra bar for those “just in case” times.
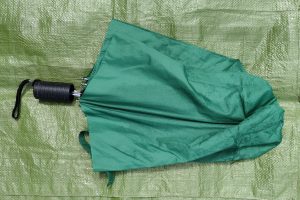
Rain Gear
This can be as simple as a disposable poncho or as complicated as a full rain suit. From my experience, if it rains, you will get wet. Regardless of the rain gear. My preferred rain gear is the light wind rain jacket with a hood shown. It breaths well and keeps most of the rain off me. It’s great for short or long hikes, it packs down nicely, and it works well when used as an outer shell over layer or alone as a light rain jacket. An umbrella is also a good option I’ve used on some trails. If I know I’ll be out in a monsoon, I may pack a full rain suit with jacket and pants. A lot of rain can be chilling, carrying away a lot of body heat, and lead to hypothermia.

Sun Protection
Here again, an umbrella pulls double duty and works well. Hats, long sleaves shirts, and sunscreen lotions are also great picks. Consider where you will be hiking and the forecasted weather. Look for a small sport stick sunscreen. At just a couple ounces it can help cover the high burn areas like the tops of ears, nose, cheeks, and shoulders without adding lots of weight to your pack.

It’s a good habit to pack some version of these “Ten Essentials” whenever you head out into the backcountry. Even for day hikes, consider carrying with you water, a snack, maybe a pocket knife, and small first-aid kit. You may use only a couple items or even none at all. But when something goes astray, you will appreciate being prepared.

#

Did you enjoy or find this post useful? Please let me know by leaving a comment below or join me on Instagram or Facebook.

On top of Blood Mountain 2011

My 2021 Backpacking List

What the heck to pack?

I’m heading out this weekend for a backpacking hike in the foothills of upstate South Carolina. I’m leading a small mixed experience group of hikers on this trip. One common question of new hikers is “What do I need to pack?” My answer is usually far from black and white. Specific gear recommendations can be very personal and individualized. I’ve seen people walk in to an outfitter and buy “everything” (from pack to socks everything) new all at once and I’ve seen people stuff what they have in a duffle they and hike the weekend. The bottom line is everyone is a little different and the same gear doesn’t work for everyone. I tell people to look around, shop around, find the things you like and try it out. Hiking or backpacking gear doesn’t need to be the latest top of the line. You need to be comfortable with your gear and it needs to perform for you when you need it to work.

I’ve been working on my gear list for years now. A little here and there. I’ll try something for a while, change it out, try something new. Generally I look for more efficient or lighter as I go. The most recent change up is with my pack. I’ve moved off my external frame to try out an internal frame. The plus of my new pack is it’s half the weight of my old, The con so far is I’ve had to take a whole new approach with organizing my gear in a top loading pack. I’ll probably come back to this later in the year. But for now, this is my basic packing list for 2021. Feel free to take a look and leave a comment.

#

Did you enjoy or find this post useful? Please let me know by leaving a comment below or join me on Instagram or Facebook.

Outdoor Tips – Stay Hydrated

As we’re now in to full blown summer, remember to stay hydrated!

If you don’t get enough water, your body simply can’t perform as well and you could end up with heat related illness such as heat stress or heat stroke. Using a hydration bladder is way better than just bottled water. When people relying on just bottled water, they tend to wait until they are thirsty to get their water out and drink, then they gulp water. If you feel thirsty, your body is already becoming dehydrated. When using a hydration bladder you can sip continuously, greatly leveling out your water in-take and making staying hydrated easier. If you are sweating while hiking or working in the summer heat, remember you are dumping electrolytes too. You need to replenish them. Munching on salty snack as you hike helps keep both your energy levels up and replaces electrolytes you may be sweating out.

Carry plenty of water and a few snacks. Remember your pack will get lighter as the day wears on.

#

Outdoor Tips – Headlamps

Are you looking for a new or replacement headlamp but not sure what to get? Between styles, cost, weight, lumens, batteries, different settings etc. It can get really confusing. Check out this headlamp guide from REI, it’s a great resource to help sift through some of the jargon. Whatever you settle on, consider a headlamp which uses common (AA or AAA) batteries. My headlamp uses AAA’s and I can a long time between needing to re-battery. A few years ago, while section hiking a part of the Appalachian Trail, I met a fellow hiker in the Nantahala Outdoor Center gear store. He was very frustrated, his “fancy” headlamp used special button batteries and of course the batteries had died several days prior. He had dropped off trail a couple times trying to find new button batteries with No-Joy, he couldn’t find replacement batteries anywhere and finally ended up just buying a new headlamp. Increasing your gear reliability and supportability will help save yourself some miles of future frustrations.

#

Outdoor Tips – New Gear

Looking to upgrade or replace gear? Watch for sales.

I know, I know. This sounds like “duh, no kidding.” It’s tempting, but new camping – hiking – backpacking gear can be crazy expensive. If you want to sale a little money, be patient and spend some time figuring out what you’re really looking for in a particular item. There’s so much information available now you can compare features and pricing easily. Considering last years model may save you considerably on “new” gear. Expect to pay full retail price on the new gear when it first comes out. When the “latest and greatest” new gear does come out however, stores will often discount the old or last years model to move it to make room for the new. I had been thinking about a new backpack for some time but the packs I had been considering were several hundred dollars and I just couldn’t make the plunge. And as luck would have it, one day there was an ad, I did some quick research, and was able to pick up a name brand backpack for half price because it was last years model. The best part is it’s also half the weight of my old pack!

Outdoor Tips – Seal It

There is little worse than being warmly huddled in a tent at 2 AM as the heavy rain starts, and there is a drip on your forehead. Except maybe waking up cold and wet to a flooded tent. Depending on how often you camp or use your gear, applying a fresh coat of waterproofing at the beginning of the season helps keep you happy when it rains.

The obvious item to hit is the tent rain fly, but also consider a healthy application of water proofing on other exposed tent fabric, backpacks, shoes, and even your rain gear. After several years of wear and tear and cleaning and washing, some of the original waterproofing may need a boost. Another useful tool in the weather proofing toolbox is seam sealer. Check the stitched seams for your rain fly’s and exposed tent seams for old or no sealer. It’s a huge help in stopping leaks where stitching pokes holes in the fabric. Apply as needed and of course follow the manufacture application instructions.

Checking your gear and applying fresh waterproofing and seam sealer (as needed) at the beginning of the camping season goes a long way toward extending the life of your tent and other gear, not to mention keeping have a dry place to go when the rains come.

#

What to do when the magnetic North Moves on you?

In recent news, the earths magnetic north pole has moved. A lot. What does this mean for the hiker trying to find their way?

If you are planning to navigate with a magnetic compass, the first thing you need to know is the average amount of variation in your area. In parts of the country and world other than South Carolina, the variation may be more or less and can be to the East instead of West. In South Carolina the magnetic declination or variation is normally between 6 and 9 degrees (depending on where you are in the state) to the West. This means when you are holding a compass in your hand, the needle will actually be pointing about 6 to 9 degrees West of the earths true North pole, it’s pointing towards the earths magnetic North pole. To find the true North direction you have to add this westerly variation to your magnetic compass reading. Simple right? Maybe.

Some compasses include an adjustment setting for declination or
variation. This is great if all your navigation is typically in one area and you have a large amount of declination, greater than 10 degrees. you can make the adjustment for your area and the compass will indicate true North. Most maps will have some sort of compass rose which typically will point to true North and may also indicate magnetic North. You should always use the most recent maps available for your area.

While a lot depends on how far you are traveling, most hikers follow established trails. In these cases, the compass is an aid to make sure you are heading in the correct direction on the trail, or to simple help you get back on trail if you step off for a quick bathroom break of to explore a bit (of course you would need to take a bearing when you head off). If you are truly navigating open areas with long distances where a couple of extra degrees of error may matter, I would recommend augmenting the compass with GPS or other aids. With regards to the movement of the earths magnetic North, I wouldn’t worry about it too much, yet.

#

Outdoor Tips – Land Navigation

Staying found is both a skill and an art. Having solid map and compass skills are invaluable when exploring the outdoors, even if you are using modern digital navigation tools. Traditional map and compass know-how will make you a better navigator and help you stay found. 

The first thing you need is a good basic compass. Here I lean toward simpler is better. I have an old starter compass I always carry with me backpacking as my go to compass. It’s fairly small, light and easy to use. Something simple like the Silva starter compass is inexpensive, works really well, and is small enough fit comfortably in a pocket or leave in a pack so you will be more likely to have it with you.  The main features your compass really need are a rotating degree ring or bezel with clean easy to read graduations, an index line, and clear base plate with a direction of travel arrow. These features make it easier to read a map with the compass and plan a course. At least initially, I would stay away from folding or lensatic compasses, small button or pendant compasses, compasses with bells, whistles, mirrors, and hard to read dials. There are lots of great internet learning resources and videos such as REI’s How to use a Compass video, Backpacker’s and WikiHow’s How to Use a Compass instructions. If you buy new compass it likely will come with instructions as well, read them and practice a little.

Being able to using a map and compass together allows you match the physical terrain of where you with your location on the map and plot a course when you need to go or where have come from.  Any map is better than no map. Even a simple hand sketch of a map is better than no map. If you can, use a map with good detail for the area you’ll be navigating. Unlike with the compass, the more detail in the map the better. I can navigate a whole lot better with a simple compass and detailed map, than I can with a complicated compass and simple map.  And use the map for planning so you can better picture and orientate the map to you location. Look for a maps compass rose or symbol. Most of the time the top of the map will be North, unless there is a compass symbol. Once you can figure out the map north then look for some sort of scale. Now you can measure direction and distance. You’re ready to navigate now. 

A few tips: When selecting a compass, try reading the dial in a dark room or area of the store, when you really need a compass it’s often in poor lighting. Some markings and graduations are difficult to read in low light. Keep the compass away from metal objects when using it. Things like belt buckles, watches, necklaces may affect the magnetic needle of the compass. Also be sure to hold the compass base plate flat and level so the compass needle can float and move freely. 

Knowing how and being able to use a map and compass together will help ensure you stay found and when other things go wrong, these skills will help you find your way.

#

Outdoor Tips – ‘Water, water, everywhere, Nor any drop to drink.’

The first really long hike I remember doing was a summer time trek in Florida’s Ocala National Forest. Planning by the group leaders was ongoing for months and had been meticulous. Detailed menus, easy mapped sections each day, we even had designated campsites for each night with potable water sources so we didn’t to carry need heavy water filters to treat water from the wild. It’s amazing how simple things multiply. For whatever reason we started out at the wrong trail head. This added way too many unexpected miles to our first day hiking in the Florida sun, from which we never really recovered. We all ran out of water miles short of the first campsite. One of my most distinct memories of this early backpacking trip was passing the numerous ponds, teaming with wildlife, and no way to treat water to drink.

Today water treatment technology makes it so easy to be prepared and to gather safe drinking water from the field. There is really no reason not to have something for water treatment tucked away in your pack.

The smart folks at the Centers for Disease Control and prevention tell us the things in back country water which will hurt us (this means pooping on ourselves, throwing up, and/or the joys of stomach or intestinal cramps) are called pathogens, and they fall in to three primary types: Protozoa (little bugs), Bacteria (littler bugs), and Viruses (littlest bugs). I know technical, right? The bottom line is you can’t see these guys. Despite folklore, you can’t just look at a water source and say “oh this looks good, no need to filter this water!” Any water from a wild source should be suspect. The real question is how much risk am I willing to take, or worded differently, how close am I to the end of the trail where I can get to a bathroom?     

Outdoor Skills – Water Treatment Methods

Why use a water treatment when outdoors? The short answer is there is simply no easy way to tell if a water source contains disease-causing microorganisms. There are people who will claim they have been drinking untreated back country water for years. At best, this can be a high risk practice. When pulling surface water from any lake, stream, or river, anywhere water is exposed, it is susceptible to contamination with microbes and viruses. The best practice is to treat water from any source. Always treat all water.

When heading out for a trip where I know I will be pulling water from a natural source, I always try to have at least two methods of water treatment. A backup method helps you be prepared when your primary method fails for whatever reasons. There is little worse than running out of water and not being able to safely refill your water bottles. We’ll take a look at some of the basic treatment methods and some of pros and cons of each.

The oldest and simplest water treatment method is to boil your water. Fill a container with clear water (strain as needed) and place over a stove or fire to bring the water to a rolling boil. Let cool and you’re done. This is a great backup method when you have a stove with you. Some of the down sides to this method are it takes fuel and time. You may need to carry extra fuel if you are going to plan to boil all the water for your trip. You also need to take time to let the water cool. The boiling or very hot water can deform some plastic water containers and scald skin.

Filtration is a great and very popular primary water treatment method. There are a number of filtration systems including straws, pumps, squeeze, and gravity systems available. Basically filtration removes biological contamination through a physical filter. So the most important thing to know here is how small are the particles the filter will take out. In this case, smaller is better. You want to start with nothing larger than 1 micron to filter out the the little bugs, like Cryptosporidium & Giardia. But you really need to move to a filter of no more than 0.3 or 0.2 microns and go smaller if you can, ideally 0.1 micron, to remove most of the other bad littler & littlest guys like Campylobacter, Salmonella, Shigella, E. coli and enterovirus, hepatitis A, norovirus, rotavirusGravity bags are great for easy and a high volume of finished water. Pumps are good for smaller groups and shallow water. Squeeze filters are great individual filter systems. The gravity systems are difficult to use with shallow water sources and can be expensive. A lot of pumping can be fatiguing. Squeeze filter are susceptible to damage from freezing due to the micro-tube filter media.

Chemicals are a good alternate plan for water disinfection and can be used with filtration to provide better results as chemical treatments are generally effective against most biological contaminants. Mostly chemical treatments are limited to some form of iodine, chlorine, or chlorine dioxide.  Chemical treatments do require an amount of “soak” time to work effectively, typically at least 20-30 minutes. So you can’t treat and drink right away, you must allow time for the chemical to do it’s job. You must follow the manufactures dosing instructions. Some people may have or develop sensitivities to the chemicals and they can leave an unpleasant aftertaste.

A couple quick tips.

Always try to pull water from the visually cleanest part of the water source. When filtering, use a pre-filter to reduce the crud getting to and clogging the main, finer filter. Keep your clean water containers separate from dirty water containers. Powdered drink mixes with citric acid can help neutralize or mast the aftertaste of chemical water treatments – after the required wait time.   

#

Outdoor Tips – Got Milk?

If you want milk on your next travel trip, try taking a shelf-life or shelf-stable type produce. I’ve froze half pints of Parmalat milk which comes packaged like juice box drinks. This type of milk package, unopened, has a long un-refrigerated shelf life and is good for camping and backup food supplies where weight isn’t an issue. Because it is real milk, it tastes better than powered and the kids like it. Freezing the milk conserves on ice. I did this on a canoe trip and 24 hours after leaving home it was still ice cold and partially frozen.

#

Page 1 of 2

Powered by WordPress & Theme by Anders Norén